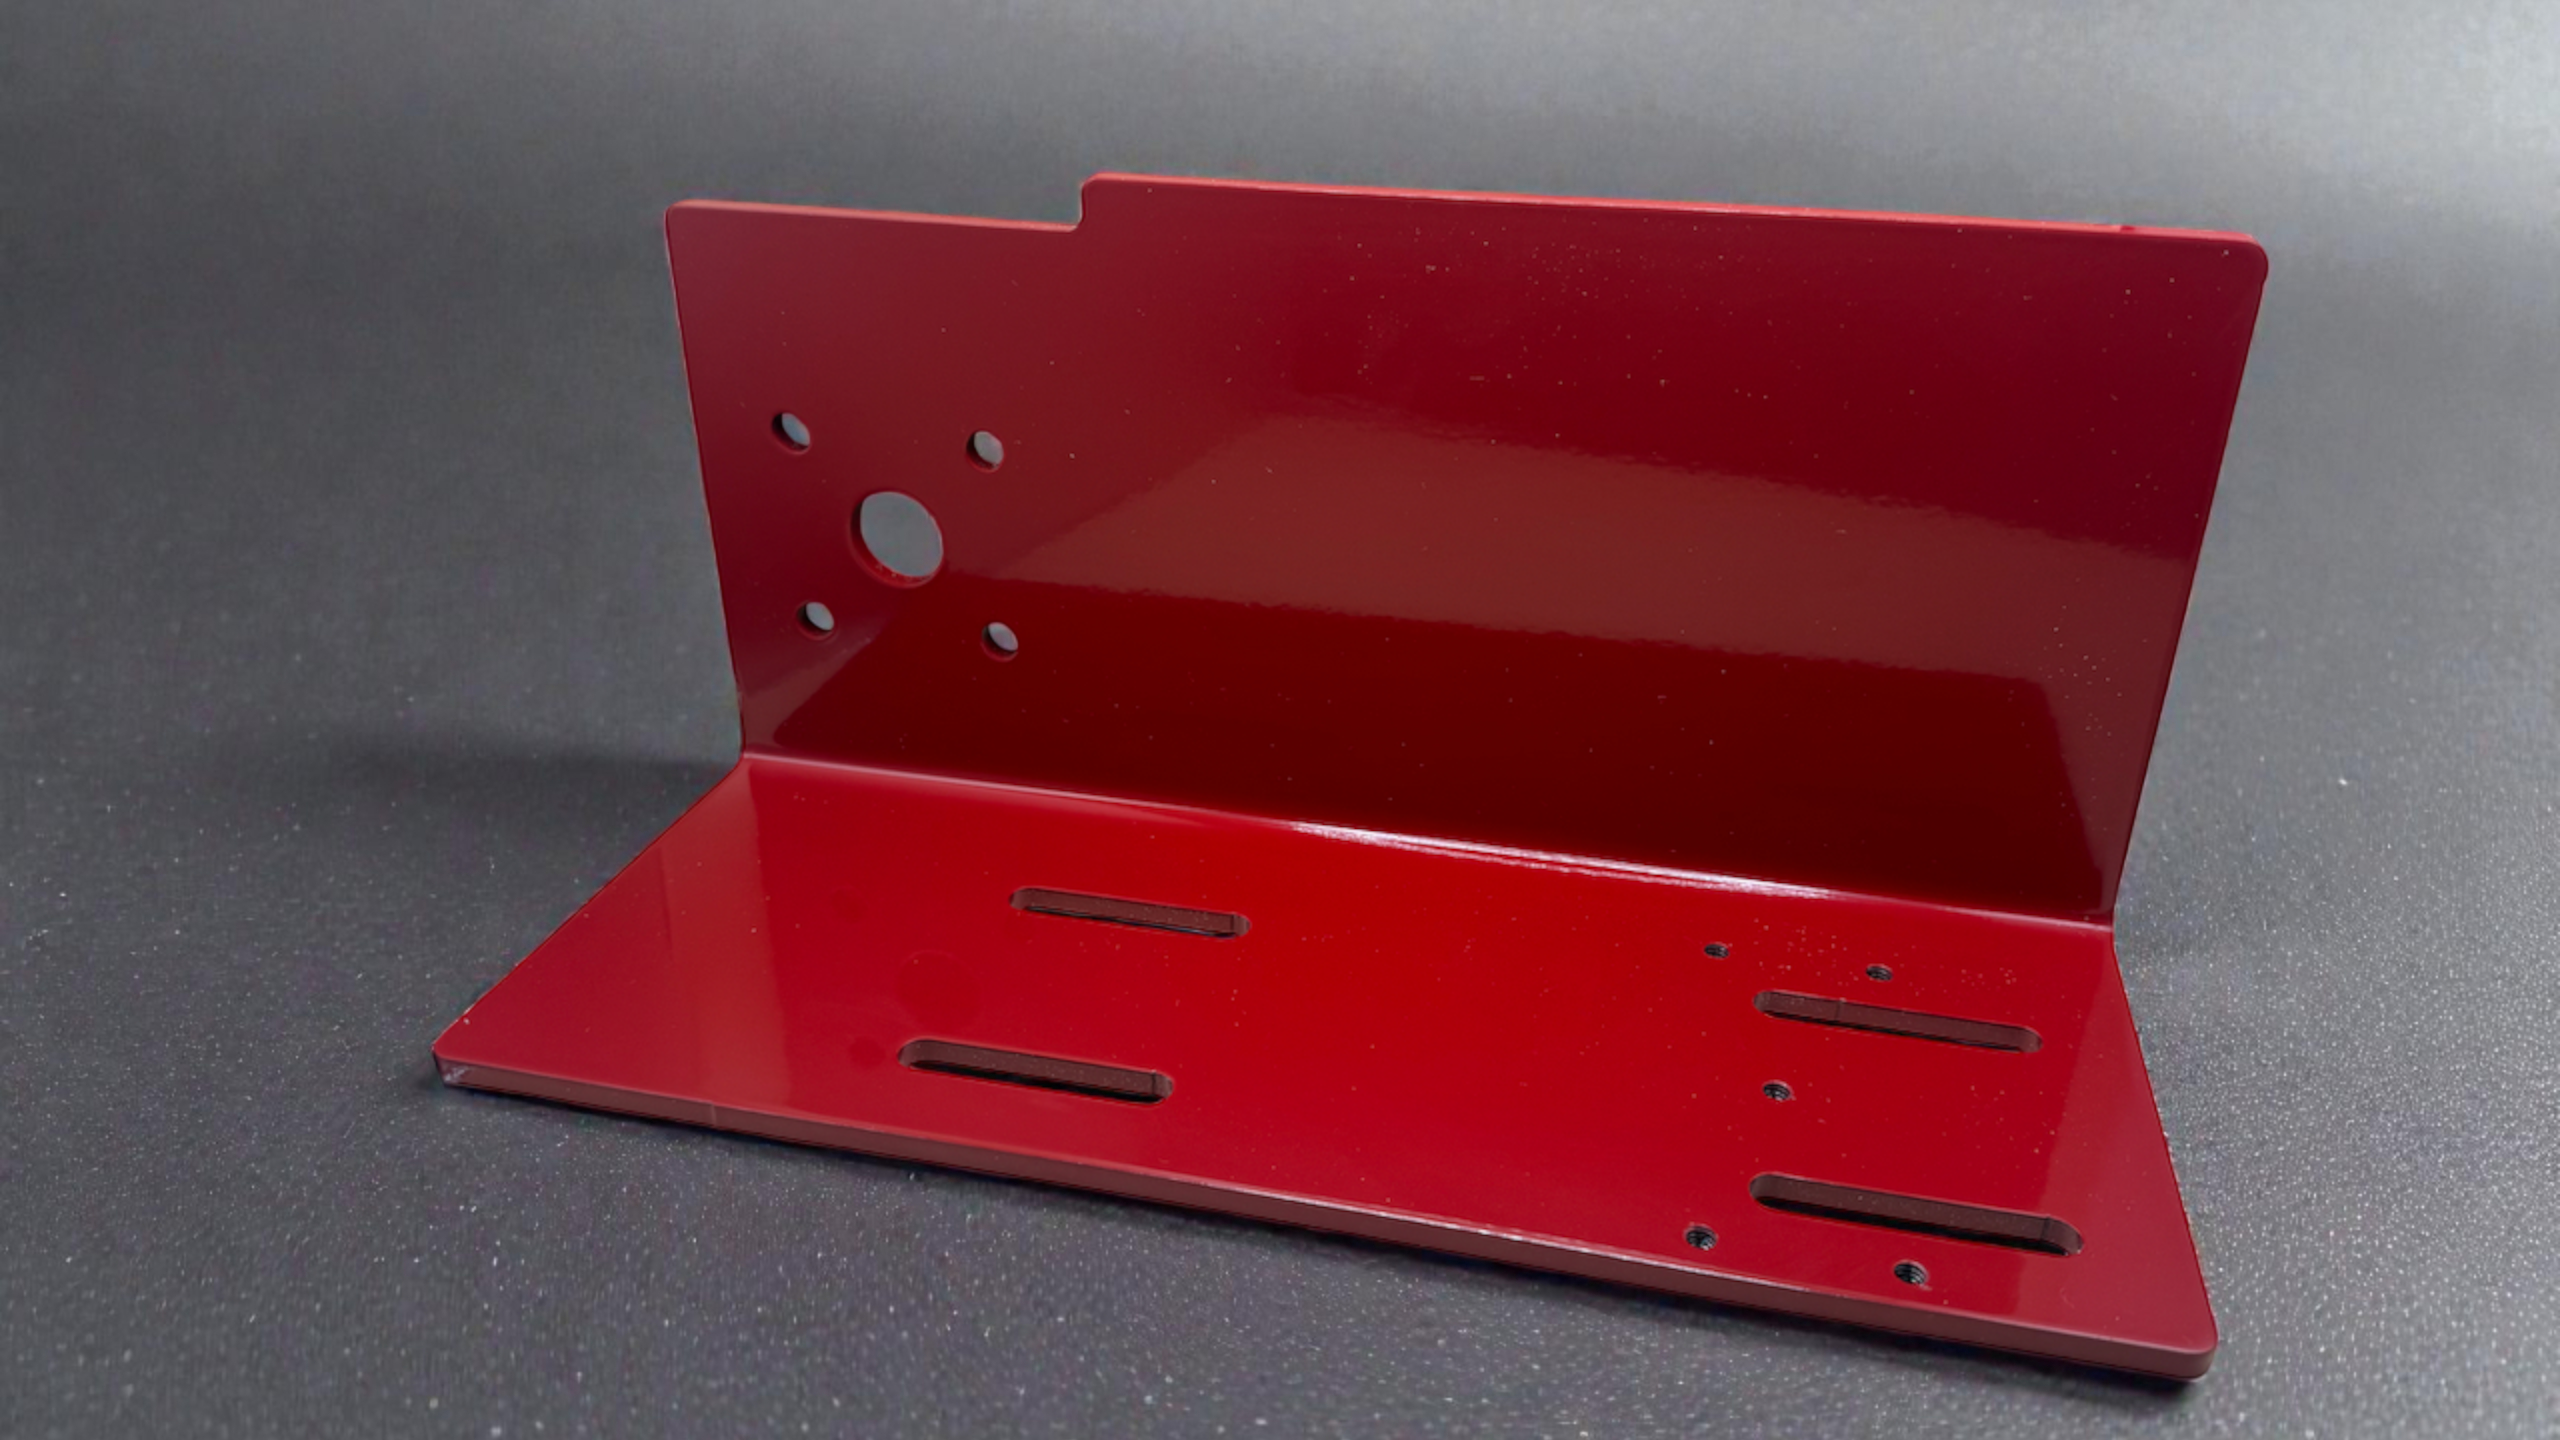
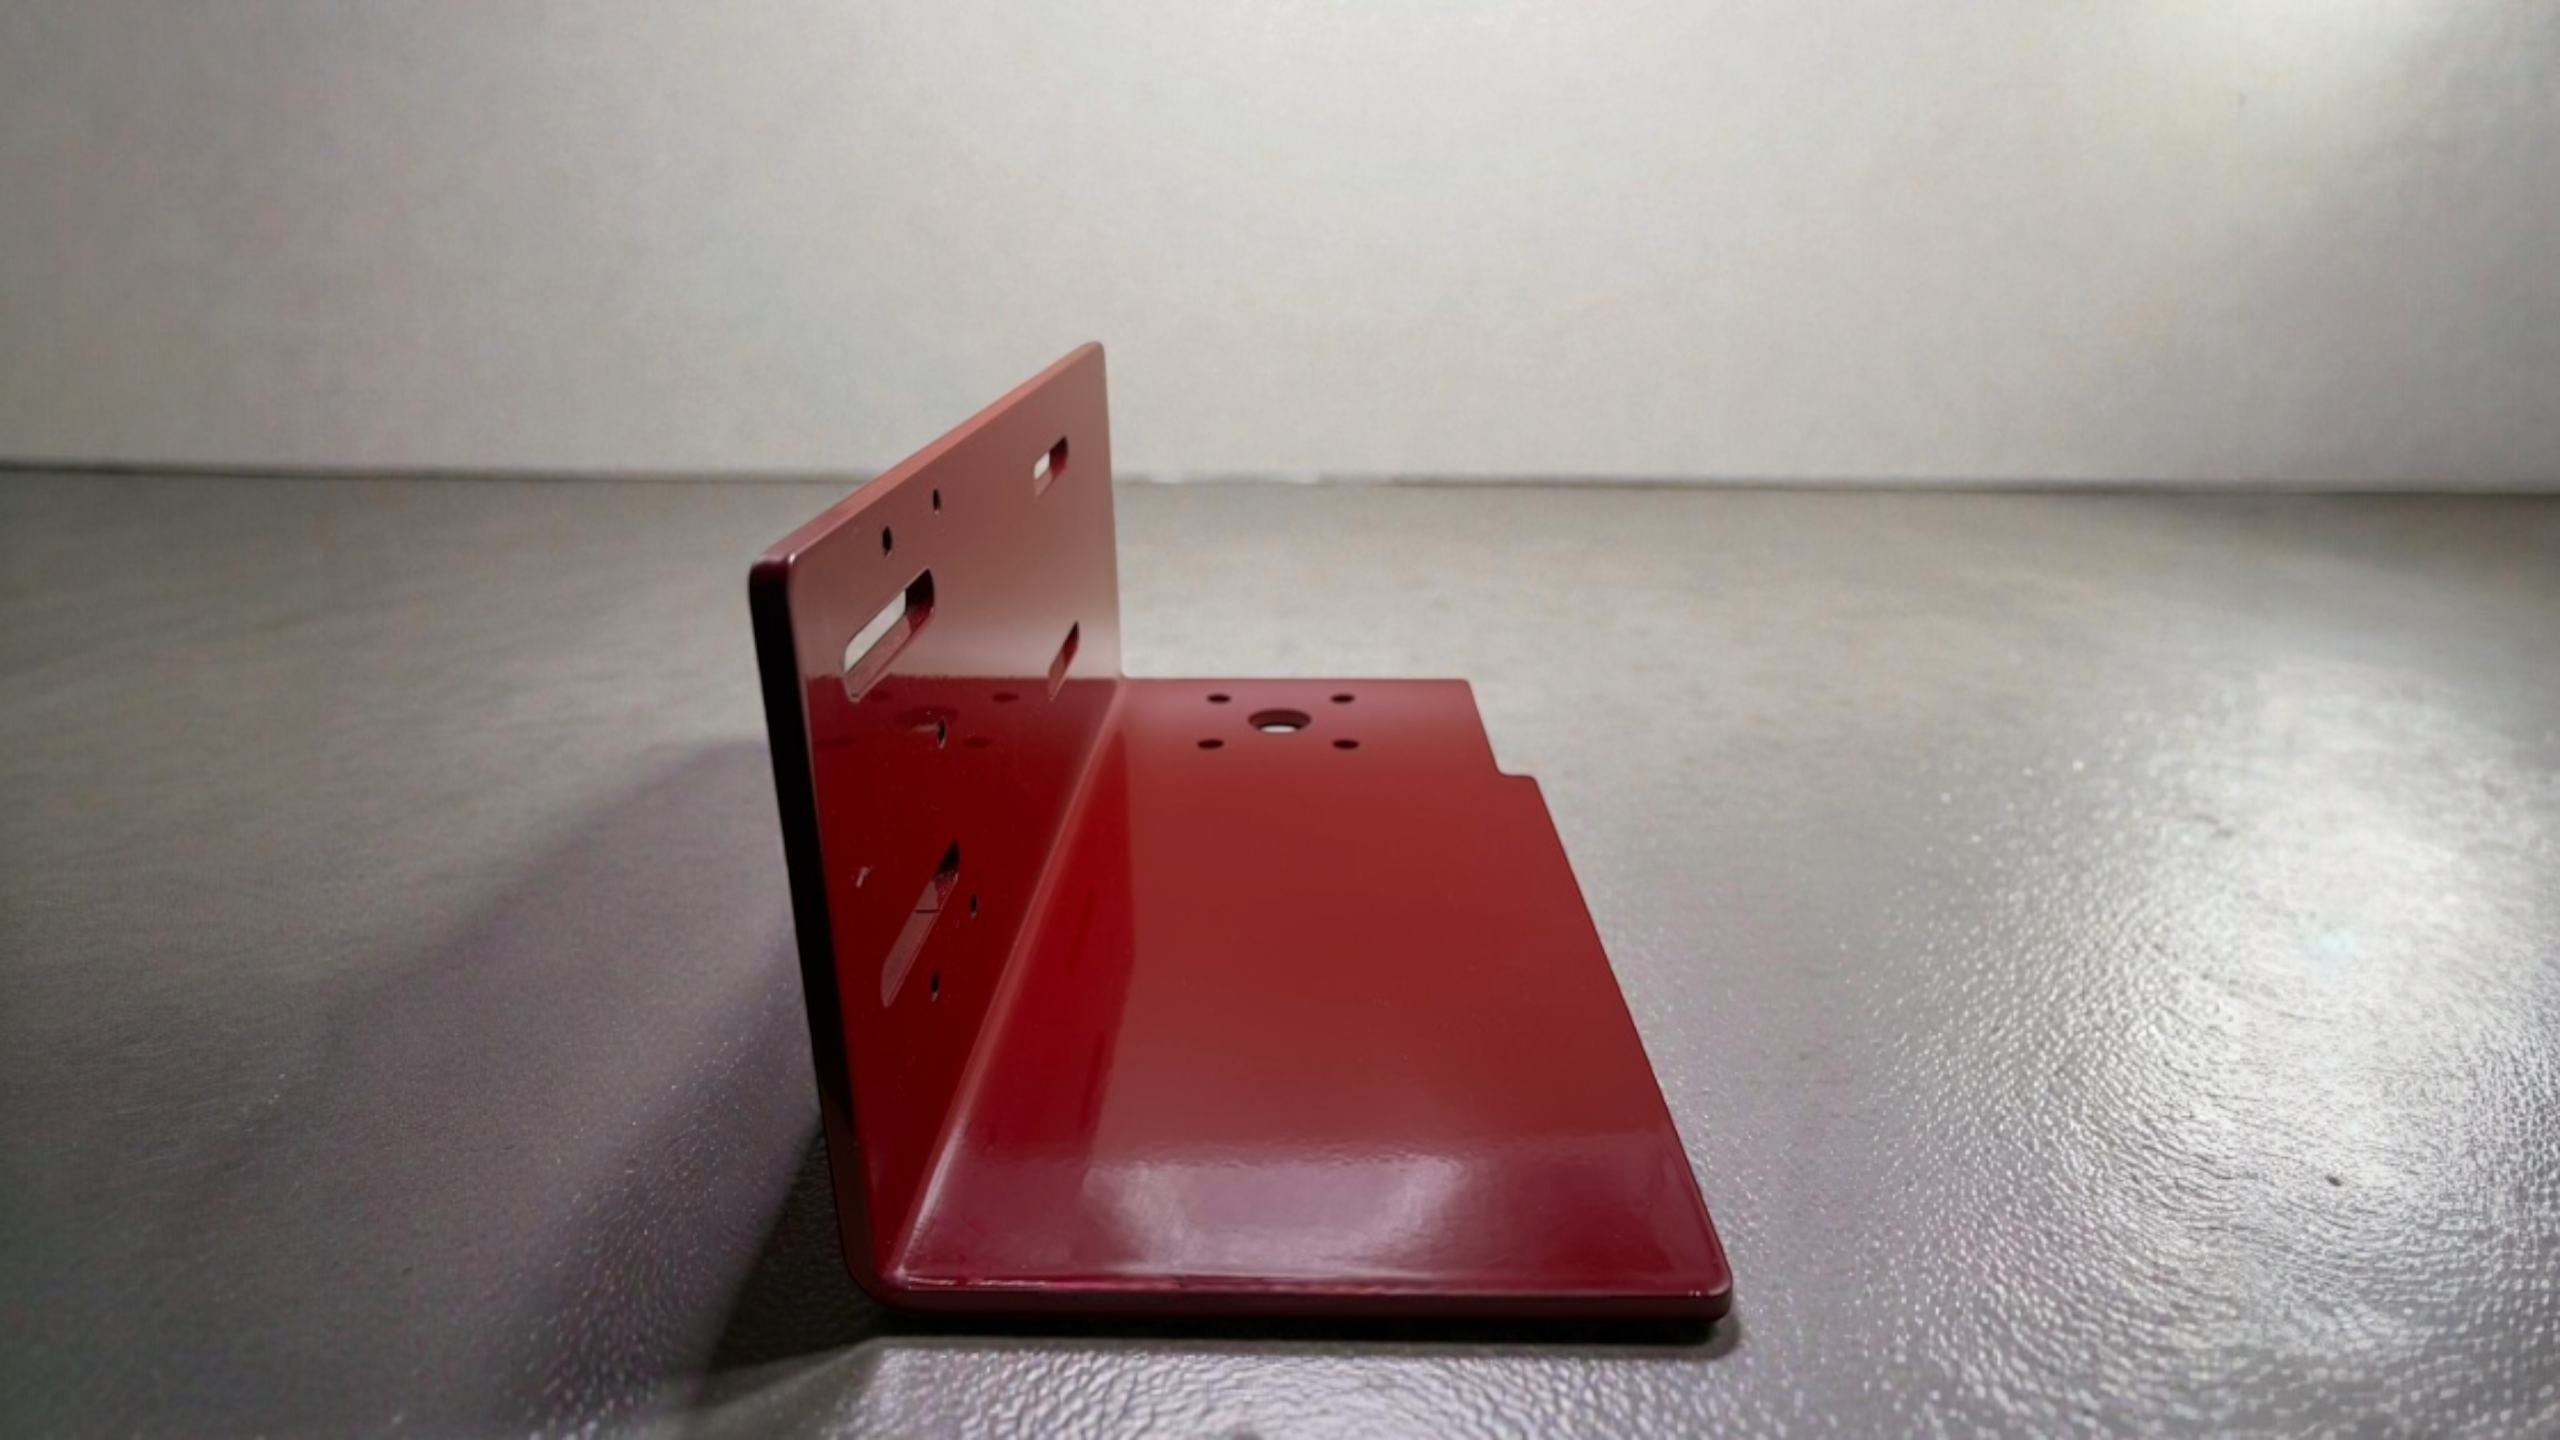
Motor Bracket - Steel .25"
Roll-off roof motor mount in 1/4" A36 steel eliminates the flex that plagues DIY brackets. Slotted holes for adjustable positioning and gear mesh. Powder coated finish.

Rock-Solid Motor Mounting. Zero Flex. Adjustable Fit.
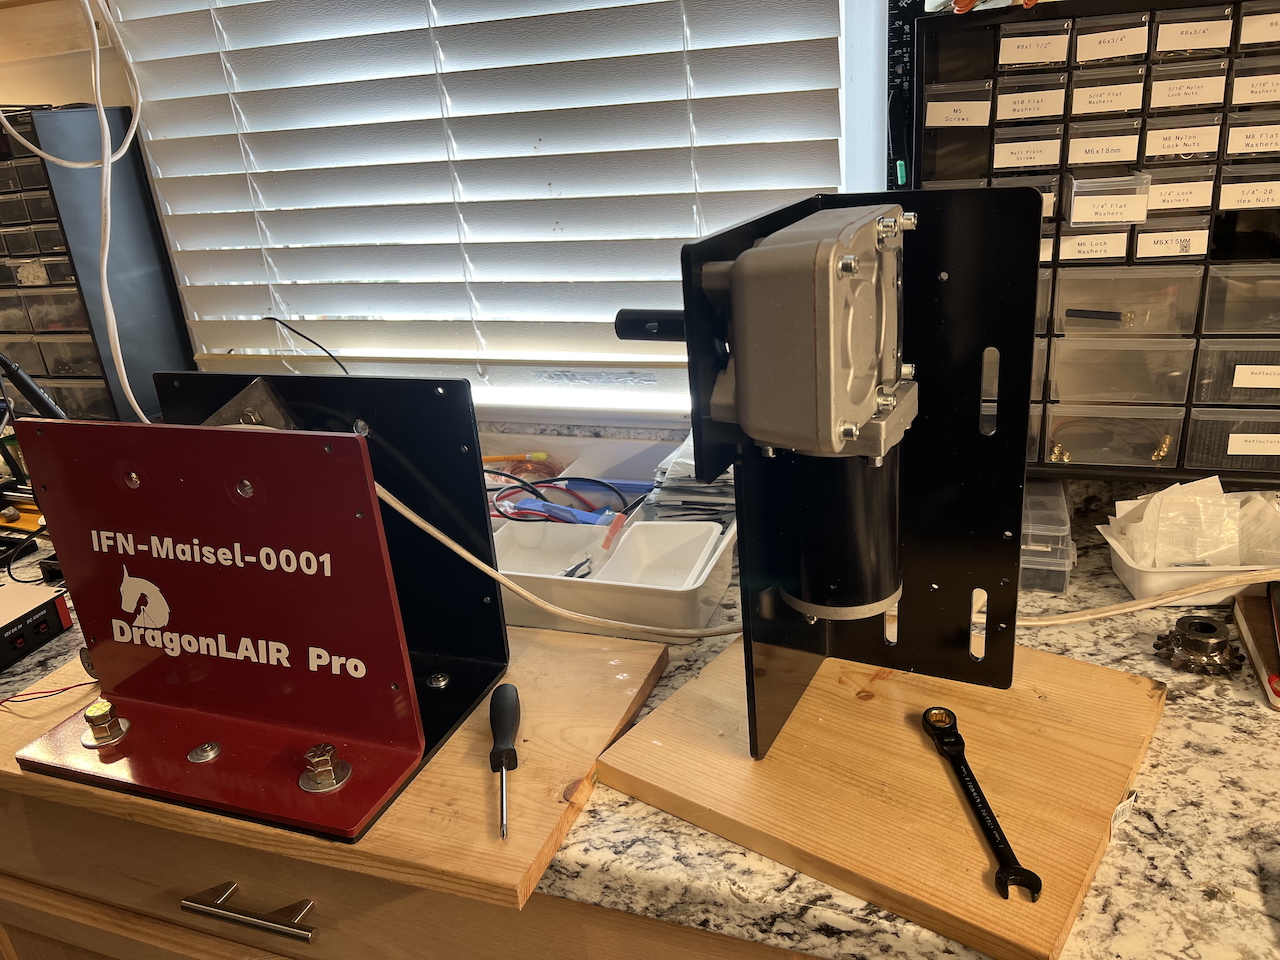
The Motor Bracket is a 1/4" thick A36 structural steel mount designed specifically for our 600W Roll-Off Roof Motor. Available in left and right hand configurations, it gives you the mounting flexibility and gear adjustment you need-without the flex that plagues DIY solutions. This is the bracket we use on our own installations, and the one we trust to hold expensive motors and gears in perfect alignment.
Why This Bracket?
We tried aluminum first. It flexed. Under the torque of a 600W motor driving a heavy roof, that flex meant inconsistent gear mesh, extra wear, and the nagging sense that something wasn't quite right. So we went heavier: 1/4" A36 structural steel, professionally powder coated for corrosion resistance.
The result is a bracket that doesn't move. Period. Dozens of these are installed across observatory systems, and we haven't had a single failure. When your bracket is a big, heavy hunk of steel that's been bent, cut, drilled, and powder coated by professionals-there's just not much that can go wrong.
The slotted mounting holes are what make installation practical. You get several inches of positioning flexibility for your lag screws, hanger bolts, or whatever hardware your structure requires. Mount into wall studs, bolt to steel framing, attach to a plywood mounting plate, or anchor into concrete. The slots accommodate your situation instead of dictating it.
Once mounted, those same slots let you slide the entire bracket-motor-gear assembly up into the rack to eliminate backlash and dial in proper gear mesh. Loosen the hardware, slide up until the teeth engage correctly, tighten it down. No shimming, no hoping you drilled the holes in exactly the right spot.
Key Benefits
1/4" Steel Won't Flex Under Load
A36 structural steel is what buildings are made of. At 1/4" thickness, this bracket handles the torque of our 600W motor without deflection. Your gear stays meshed correctly, your motor doesn't work against a flexing mount, and your drive system operates the way it should. We learned this the hard way with aluminum-now you don't have to.
Slotted Holes for Real-World Installation
Perfect hole placement requires knowing exactly where the structural members are, how your rack is positioned, and where everything needs to line up. In reality, you're working with existing construction, imperfect measurements, and the need to adjust. The slotted mounting holes give you room to work-position the bracket where it needs to be, not where pre-drilled holes force it to be.
Adjustable Gear Mesh Eliminates Backlash
After mounting, you can slide the bracket up or down to engage the pinion gear with your rack at the perfect depth. Too loose and you get slop; too tight and you're adding unnecessary friction. The slots let you find the sweet spot and lock it in. This is the adjustment that makes the difference between a drive system that works and one that works well.
Left and Right Hand Configurations
Not every observatory is laid out the same way. Depending on which side of your building the motor needs to mount, you'll need either a left or right hand bracket. We offer both. Not sure which one you need? Reach out and we'll help you figure it out.
Professional Powder Coat Finish
The bracket is powder coated for durability and corrosion resistance. This isn't spray paint-it's a baked-on finish that handles the outdoor exposure and temperature swings of an unheated observatory. It also looks good, which matters when you've put effort into building a quality setup.
11 Threaded Mounting Points
Beyond the motor mount itself, the bracket includes 11 × 1/4-20 threaded holes for mounting accessories, cable management, or whatever else your installation requires. It's a small detail that adds flexibility without adding cost.
What's Included
- Motor Bracket (1/4" A36 steel, powder coated)
- Left OR right hand configuration (specify when ordering)
Technical Specifications
| Specification | Value |
|---|---|
| Material | A36 structural steel |
| Thickness | 1/4" (0.25") |
| Finish | Professional powder coat |
| Motor Mounting | 4-hole pattern (matches DDA 600W motor) |
| Wall Mounting | Slotted holes for adjustable positioning |
| Accessory Mounting | 11 × 1/4-20 threaded holes |
| Configurations | Left hand or right hand |
Integration/Compatibility
The Motor Bracket is designed to work with:
- DDA 600W Roll-Off Roof Motor - Direct fit using the 4-hole bolt pattern
- DDA Drive Gear - Standard Module 4 gear for gate opener racks
- BYO Upgrade Pinion Gear - For Backyard Observatories rack compatibility
- Any rack system - The bracket holds the motor; rack compatibility depends on your gear choice
This bracket is one component of a complete drive system. For a full setup, you'll also need the motor, drive gear (or BYO gear), and rack.
Installation/Setup Reality Check
Plan for about an hour to install the bracket and motor assembly. This is a moderate skill level job-you should be comfortable with power tools and working with structural mounting.
The honest truth: This bracket is heavy. With the motor attached, it's heavier. You may want a second pair of hands to hold things in position while you mark and drill.
Recommended installation process:
- Attach the motor (with gear) to the bracket
- Hold the assembly up in position and rough-mesh the gear with the rack
- Center the rack on the gear and mark the bracket's position on your mounting surface
- Take it down and remove the motor
- Hold the bracket back up at your marks and mark the mounting hole locations
- Position your marks in the middle of the slots-you need adjustment room
- Drill pilot holes with the appropriate bit for your mounting hardware
- Mount the bracket and start your lag screws or bolts (don't fully tighten yet)
- Reattach the motor and gear
- Slide the assembly up to achieve proper gear mesh
- Tighten all mounting hardware
Important: Make sure your mounting hardware goes into solid structural components-wall studs, steel framing, or properly anchored concrete. Don't rely on just plywood, OSB, or siding.
Tools needed: Drill with appropriate bits, socket set, wrenches
Skill level: Moderate-if you're comfortable with basic construction tasks and have mounted heavy items to walls before, you can handle this.
What You Need to Provide
From Dark Dragons Astronomy (sold separately):
- 600W Roll-Off Roof Motor - Includes bolts to attach motor to bracket
- Drive Gear or BYO Upgrade Pinion Gear - Depends on your rack system
- Drive Rack - If you don't already have one installed
You'll also need:
- Mounting hardware - Lag screws, hanger bolts, lag bolts, or appropriate anchors for your structure
- Drill and bits - Sized for your mounting hardware
- Socket set and wrenches - For tightening everything down
- A helper - Recommended for holding the assembly while marking and mounting
Real-World Performance
Dozens of these brackets are installed on observatory systems, and we've had zero failures. That's not surprising-it's a 1/4" steel bracket. There's nothing complex to break, nothing electronic to malfunction, nothing that degrades over time. It holds the motor in position, lets you adjust the gear mesh, and stays put.
We designed this bracket after trying alternatives that didn't work. Aluminum was lighter but flexed under load. Thinner steel had the same problem. The 1/4" A36 steel with slotted holes is what we arrived at after learning what actually works in the field. Now it's the only motor bracket we sell, because it's the only one we trust.
The Foundation of Your Drive System
Your motor is only as solid as what it's mounted to. A bracket that flexes, a mount that wasn't designed for the torque, hardware that's not anchored properly-any of these turns a good motor into a frustrating installation.
The Motor Bracket eliminates those problems. It's overbuilt because under-built doesn't work. It's adjustable because perfect hole placement is a myth. And it's available in left and right hand configurations because observatories aren't all the same.
Pair it with our 600W motor, drive gear, and rack for a complete drive system. Or use it with your existing rack if you're upgrading from manual operation. Either way, you get a motor mount that does its job without drama.
Not sure whether you need left or right hand? Reach out-we're happy to help you figure out the right configuration for your setup.
Need help? Join our Discord community for installation guides, troubleshooting, and direct support.