MiniLAIR Observatory
Free MiniLAIR observatory plans let you build a 6'×6' roll-off roof observatory for about $1,000. Drawer slide design looks like a shed-perfect for HOA-restricted neighborhoods. The file is designed to be opened with Fusion 360. They have a free online viewer and a free version for non-commercial use.
Download File
Loading file information...
Authentication Required
Please log in or create an account to access this download.
Build a Real Observatory for About $1,000-Plans Are Free
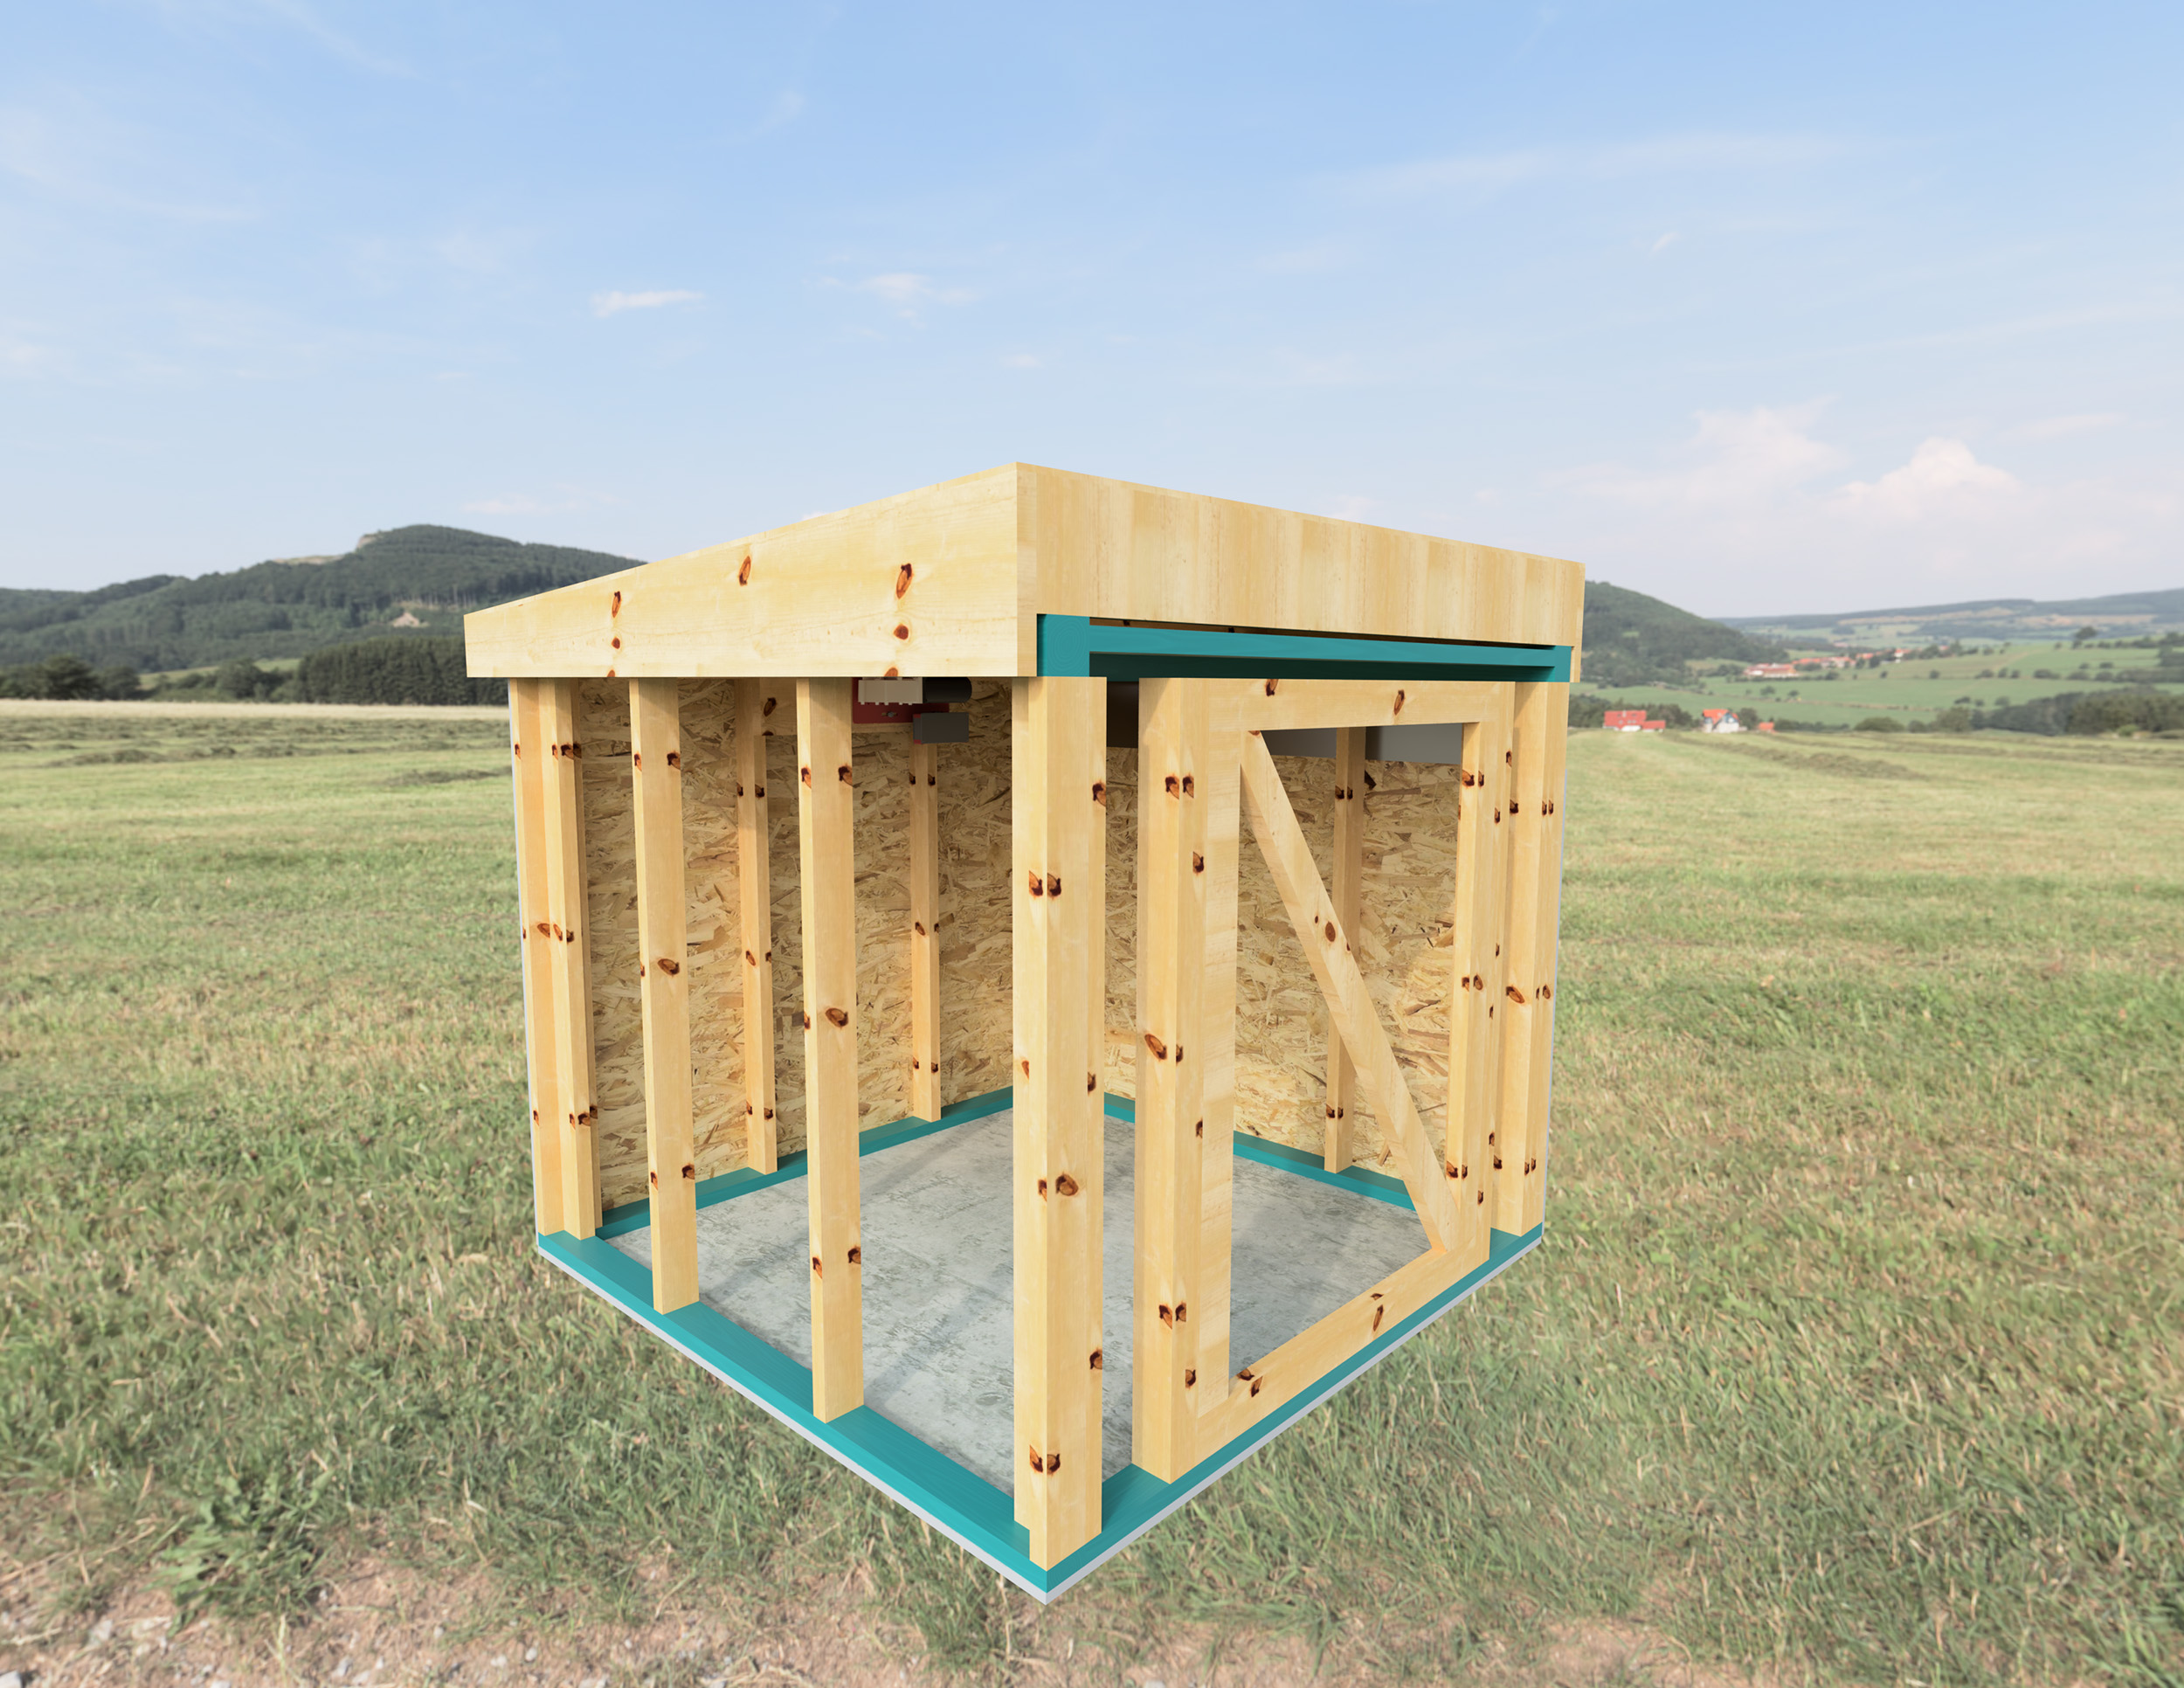
The MiniLAIR is a 6' × 6' roll-off roof observatory that looks like a storage shed, goes up in a weekend, and protects your telescope from the elements year-round. We're releasing the complete plans-detailed drawings, CAD files, and community support-for free.
The Story Behind the MiniLAIR
At NEAF 2023, we brought a complete working observatory to our booth. We thought people would be interested in the DragonLAIR controller inside it.
What actually happened: The observatory itself stole the show.
Equipment companies asked to manufacture them. Amateur astronomers asked where to buy one. Everyone wanted to know how we'd built it and what it cost. We spent two months refining the design, thinking we'd produce them commercially. Then reality hit: building observatories is physically demanding, and shipping a 6' × 6' structure would be prohibitively expensive.
So we made a different choice: Release the plans for free.
We're makers ourselves. We understand the satisfaction of building something with your own hands. We believe more astronomers should have access to affordable observatory designs-not just those who can spend thousands on commercial structures or piece together incomplete forum posts.
Since releasing the plans, MiniLAIRs have been built in the New Mexico desert (three of them), Los Angeles, and Georgia. Different climates, different builders, same result: a working observatory that protects equipment and doesn't attract unwanted attention.
Come join us on our Discord chat to talk with others who have built a MiniLAIR.
Key Benefits
Drawer Slides Instead of Outriggers-The Innovation That Matters
This is what made people stop at our NEAF booth. Traditional roll-off roof designs park the roof on external supports (outriggers) that stick out when open. This creates problems: neighbors notice, HOAs complain, you need extra clearance, and the parked roof sits exposed to wind.
The MiniLAIR uses 500 lb industrial drawer slides-the kind designed for heavy-duty commercial applications. The roof rides on these slides, rolling back along the building without any external support structure. When closed, it looks exactly like a small storage shed. When open, the roof tucks behind the walls instead of extending beyond them. No protruding structures. No obvious telescope features. Just a shed.
Stealth Astronomy for Restricted Neighborhoods
Many astronomers face obstacles to building an observatory: HOA rules, setback requirements, neighbor concerns, spouse approval. The MiniLAIR addresses all of these by not looking like an observatory at all.
When closed, it's a 6' × 6' storage shed or oversized dog house. Nothing screams "telescope inside." No dome, no obvious astronomical features, no protruding roof structure when open. You're not hiding anything-you're just building something that fits the neighborhood aesthetic.
36 Square Feet Often Means No Permit
At 6' × 6', the MiniLAIR falls under many jurisdictions' thresholds for requiring building permits. Many areas allow structures under 100-120 square feet without permits, and the MiniLAIR is only 36 square feet. That means lower cost (no permit fees), faster construction (no approval wait times), and less bureaucracy. Always check your local codes, but you may be able to build without any permitting process.
About $1,000 in Materials-Less Than a Mid-Range Mount
The materials list runs about $1,000: lumber, siding, roofing, the 500 lb drawer slides, hardware, and basic weatherproofing. That's less than what many astronomers spend on a single telescope mount. For that investment, you get a permanent structure protecting equipment that might be worth $10,000 or more.
Not included in that estimate: foundation prep (varies by approach), interior finishes, electrical, automation, or tools. But the structure itself-what other plans charge you $50-$200 just to see-comes in around $1,000 to actually build.
1-2 Days to Build
The structure itself goes up quickly. Most builders complete framing, siding, roofing, and slide installation in one or two focused days of work. This isn't a months-long project that stalls halfway through-it's a weekend build that results in a working observatory.
Foundation prep varies (could be a weekend for a simple gravel pad, longer for concrete), and finishing touches like paint, interior work, or electrical add time. But the observatory itself is ready to use in days, not weeks.
What's Included
Detailed Construction Drawings:
- Overall dimensions and layout
- Framing details
- Drawer slide mounting specifications
- Roof construction
- Wall and siding details
- Component specifications
Editable CAD Files:
- Modify dimensions if needed
- Adapt design to your specific requirements
- Generate custom cut lists
- Integrate with your own planning software
Community Support:
- Access to our Discord community
- Build progress photos from other builders
- Lessons learned and modifications
- Troubleshooting help from people who've done it
Technical Specifications
| Specification | Value |
|---|---|
| Footprint | 6' × 6' (36 sq ft) |
| Telescope Capacity | Up to 8" RC-style, mid-sized refractors, most SCTs/MCTs |
| Drawer Slides | 500 lb capacity industrial slides (required) |
| Materials Cost | ~$1,000 (structure only) |
| Construction Time | 1-2 days (excluding foundation) |
| Foundation | Simple-solid and level (concrete, pavers, or gravel) |
| Skill Level | Wood frame construction experience (or hire a handyman) |
| Automation | Optional-works with DragonLAIR system |
Integration/Compatibility
Manual Operation: The MiniLAIR works perfectly well as a manual observatory. The drawer slide mechanism makes opening and closing easy by hand-no power required. Many builders start manual and add automation later.
Automated Operation: When you're ready for remote control, the MiniLAIR accepts our Complete Roll-Off-Roof System with DragonLAIR controller. Full ASCOM/INDI compatibility means integration with N.I.N.A., Sequence Generator Pro, Voyager, and other imaging platforms. Add weather integration for automatic closure when conditions turn unsafe.
Telescope Compatibility:
- Up to 8" RC-style telescopes fit comfortably
- Mid-sized refractors (shorter focal length)
- Most SCTs and MCTs up to 8"
- Small to medium imaging rigs
Not Ideal For:
- Long refractors (limited height and length)
- Multiple telescope installations
- Very large aperture scopes (10"+)
Installation/Setup Reality Check
Foundation: Keep it simple-solid and level. Concrete slab, concrete piers with treated lumber, gravel pad with leveled pavers, or treated lumber base on compacted gravel all work. The critical requirements are that it's level (the drawer slides require level operation) and solid (to prevent settling and misalignment).
Construction Time: 1-2 days for the structure itself, assuming your foundation is ready.
Tools Needed: Standard carpentry tools-saw, drill, level, square. Nothing specialized or expensive.
Skill Level: These aren't step-by-step IKEA instructions, but anyone with wood frame construction experience can follow them without issue. If you've framed a wall or built a deck, you'll understand the drawings. If not, a local handyman can build this from our plans-the design is straightforward even if the documentation assumes some construction knowledge.
The Honest Part: You'll spend time on planning and prep beyond the 1-2 day build window. Reading through the plans, sourcing materials, preparing the foundation, and gathering tools all take time. But the actual construction is straightforward and fast.
What You Need to Provide
- Foundation materials - Concrete, gravel, pavers, or whatever approach suits your site
- Lumber and framing materials - Standard construction lumber per the plans
- Siding and roofing materials - Your choice of exterior finish
- 500 lb industrial drawer slides - The one specialty item (readily available online)
- Hardware and fasteners - Screws, bolts, weatherproofing materials
- Basic carpentry tools - Saw, drill, level, square, measuring tools
Optional:
- Electrical materials (if adding power)
- Interior finishing materials
- DragonLAIR automation system
Real-World Performance
The original MiniLAIR debuted at NEAF 2023, where it demonstrated smooth roof operation, weather resistance through multiple rain events at the show, and structural stability that impressed industry professionals-including equipment companies who asked about manufacturing rights.
Since releasing the plans, builders have completed MiniLAIRs in:
- New Mexico (three installations) - Taking advantage of Bortle 1-2 skies in the desert
- Los Angeles - Proving the design works in dense urban areas with restrictions
- Georgia - Handling humid southern climate conditions
These aren't just successful builds-they're proof the design works across different climates, locations, and builder skill levels. The community on Discord continues to share modifications, lessons learned, and photos of completed observatories.
Why We're Giving This Away
We could sell these plans. We're releasing them free because:
We're makers ourselves. We understand the DIY mindset and the satisfaction of building your own equipment.
We want to help the community. More astronomers should have access to good observatory designs-not just those who can afford commercial solutions.
Manufacturing didn't make sense. The physical labor and shipping costs made production impractical, but the design shouldn't go to waste.
It's already built and proven. We invested the time refining the design. Sharing it costs us nothing and helps many.
And yes-many builders eventually want to automate, and we have the perfect solution for that when they're ready.
Get Started Building
Step 1: Download the free plans (create an account or login above)
Step 2: Review the drawings and CAD files. Check your local building codes.
Step 3: Source materials. Most components are available at any building supply store. The 500 lb drawer slides are the only specialty item.
Step 4: Prepare your foundation-solid and level are the critical requirements.
Step 5: Build. Take your time. Ask questions in the Discord community if you get stuck.
Step 6: Start imaging. Share your build on Discord to inspire others.
For the cost of materials and a weekend of work, you can have a permanent observatory protecting your equipment-one that doesn't attract attention and might not even require a building permit.
The plans that started as a NEAF demo are now yours to build.
Need help? Join our Discord community for installation guides, troubleshooting, and direct support.